10 Unique Water Bath Canning Recipes to Try Today
Discover my favorite unique water bath canning recipes that add creative twists to traditional preserves. From spiced fruit butters to savory sauces, preserve nature's bounty
PREPPING POSTS
Kathrine-Anne Hill
11/13/202414 min read

Affiliate Disclosure:
Please note that some of the links in this article are affiliate links. This means that if you click on these links and make a purchase, I may receive a small commission at no additional cost to you. This commission helps support the maintenance and growth of this website and allows me to continue providing valuable information and recommendations. Rest assured, I only recommend products and services that I have personally used or thoroughly researched. Your support is greatly appreciated! “As an Amazon Associate I earn from qualifying purchases.” For full disclosure see our Privacy Policy and Terms and Conditions here.
10 Unique Water Bath Canning Recipes to Try Today
I'm excited to share 10 unique water bath canning recipes with you. These recipes will make your taste buds dance. Preserving nature's gifts is a joy, and these recipes show the creativity of water bath canning.
These recipes include spiced fruit butters and savory sauces. They add flavor to your pantry and help preserve nature's bounty. Water bath canning is great for preserving fruits, jams, jellies, and pickles.
Whether you're new to canning or experienced, you'll find something interesting here. Let's explore these 10 unique recipes together. They'll take your homemade preserves to new levels!
Key Takeaways
Discover a variety of unique water bath canning recipes that add creative twists to traditional preserves.
Explore recipes for habanero apricot jelly, pickled watermelon rind, strawberry lemonade concentrate, and more.
Learn about the versatility of water bath canning in creating different types of preserved foods, from syrups to sauces.
Gain insights into using fresh, seasonal produce and preserving it for year-round enjoyment.
Find inspiration to expand your canning skills and explore unconventional ingredients in the canning process.
Understanding the Basics of Water Bath Canning
Water bath canning is a great way to keep high-acid foods fresh. It uses boiling water to kill bacteria and seal jars tight. This method keeps food fresh and flavorful.
As someone who cares about food safety, I've learned it's important to know the basics. This knowledge helps you preserve many tasty and healthy foods.
Essential Equipment for Water Bath Canning
To start water bath canning, you need the right tools. You'll need canning jars, lids, and rings. Also, a big pot or canner for the jars.
Jar lifters and a canning funnel make the job easier and safer. Good canning equipment is key for food safety and preservation methods.
Safety Guidelines and Best Practices
Make sure all your equipment is clean and sterilized before you begin.
Use tested recipes to keep food safe from botulism.
Watch the processing times and seal jars right to get a good vacuum seal.
Difference Between Water Bath and Pressure Canning
Water bath canning works for foods like fruits, tomatoes, and pickles. But, it's different from pressure canning. Pressure canning is needed for low-acid foods like meats and some fruits.
Knowing which method to use for each food type is important. This ensures your home-canned food is safe and tasty.
Learning the basics of water bath canning opens up a world of possibilities. You can fill your pantry with tasty, long-lasting foods. Just remember to follow food safety rules and use the right canning equipment.
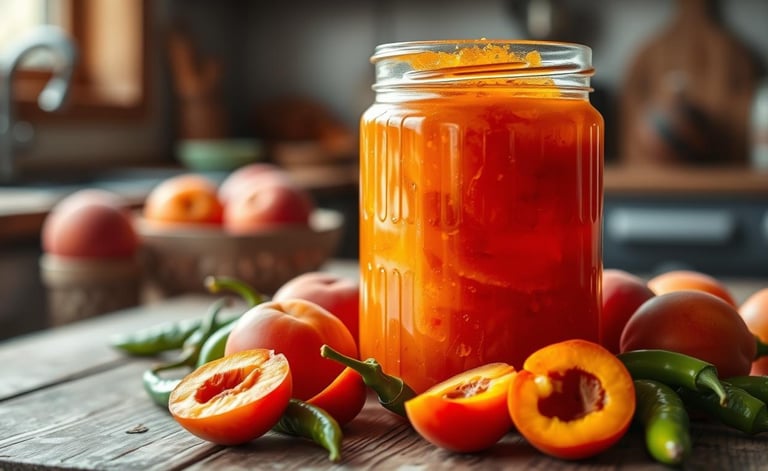
Sweet and Spicy Habanero Apricot Jelly
I love cooking at home and making my own condiments. Today, I'm excited to share a recipe that's both sweet and spicy. It's the Sweet and Spicy Habanero Apricot Jelly.
This jelly is a mix of apricot sweetness and habanero heat. It's great on biscuits, as a meat glaze, or with cheese. Its bright color and bold taste will wow your guests.
The recipe comes from the Ball Book of Canning and Preserving. It makes about 6 half-pint jars of this tasty jelly. Let's get into the details:
Ingredients: 1 1/2 cups white vinegar, 2/3 cup finely chopped dried apricots, 6 cups sugar, 1/2 cup finely chopped red bell pepper, 1/2 cup finely chopped red onion, 1/4 cup finely chopped seeded habanero pepper, and 1 (3-oz) pouch of Ball® Liquid Pectin.
Preparation Time: About 30 minutes, with cooking taking around 18 minutes.
Serving Size: This recipe feeds 4 to 6 people, with each serving having about 104 calories.
Sponsored by Ball® home canning products, the jelly is canned for 10 minutes to keep it fresh.
I'm excited for you to try the Sweet and Spicy Habanero Apricot Jelly. It's a unique mix of sweet and spicy. Enjoy it on toast, biscuits, or as a glaze for grilled meats.
Classic Dill Pickle Relish with a Twist
Make your summer cookouts unforgettable with my homemade dill pickle relish recipe. It's a twist on the classic that will excite your taste buds. Made with fresh cucumbers and a special spice mix, it's great on hot dogs, burgers, or in salads and dressings.
Selecting the Perfect Cucumbers
Choosing the right cucumbers is key for a great dill pickle relish. Use small pickling cucumbers like Boston Pickling, Bush Pickle, or National Pickling. They offer a perfect mix of crunch and flavor.
Customizing Your Spice Blend
While dill and garlic are the base, I add unique touches to my relish. Try mustard seeds or celery seeds for extra flavor. Feel free to mix in fresh dill or tarragon to make it your own.
Storage and Usage Tips
Store your canned relish in a cool, dark spot for up to a year. It's perfect with grilled meats, on sandwiches, in salads, or as avocado toast topping. It's also great with crackers or crusty bread for a quick snack.
Enjoy the summer with this classic dill pickle relish recipe. Savor the fresh, tangy taste of homemade goodness all year.
8 pounds cucumbers
1/2 cup diced yellow onion
1 medium diced jalapeno
1/2 cup pickling salt
2 teaspoons turmeric
4 cups water
4 cups white vinegar
1 tablespoon sugar
1 tablespoon dill seed
1 tablespoon fresh dill
The relish is processed in a water bath canner for 10 minutes. It can be stored in a dark place for up to 1 year. You can halve the recipe for 5 half-pint jars. Or, freeze it instead of canning.
Unique Water Bath Canning Recipes for Seasonal Produce
As the seasons change, so does the fresh produce available. This change is perfect for making unique and tasty water bath canned goods. From summer fruits to autumn veggies, there's a lot to explore in canning, fruit preservation, and vegetable canning.
Try making spiced pear butter for autumn's flavors. Or, make a mixed berry jam for summer's tastes. Pickled green beans add a crunchy twist to veggies.
For a sweet-and-sour mix, try pickled watermelon rind with Asian spices. It's a refreshing choice. The classic dill pickle relish is also a hit, capturing summer's essence.
As the year goes on, you can can different seasonal produce. Enjoy Meyer lemons in January and cranberries in February. Each month brings new flavors to enjoy through water bath canning.
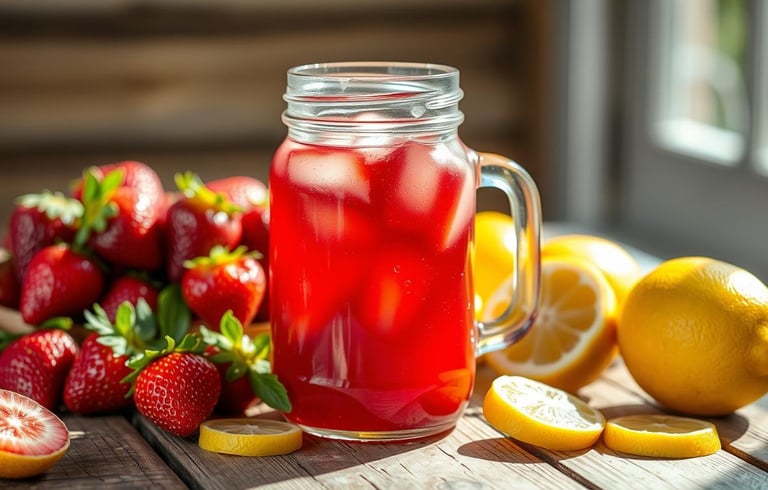
Homemade Strawberry Lemonade Concentrate
Enjoy the sweet and tangy taste of homemade strawberry lemonade concentrate. It's great for hot summer days or adding flavor to drinks and desserts.
Choosing the Ripest Strawberries
For the best strawberry lemonade, pick the ripest strawberries. Look for deep red, plump berries with a sweet smell. You'll need 6 cups of these for the recipe.
Balancing Sweet and Sour Flavors
The recipe balances sweet and sour with 4 cups of lemon juice and 6 cups of sugar. This mix makes the concentrate refreshing and balanced.
This batch makes 7 pint jars. Each pint can be mixed with water or club soda to make a gallon of lemonade. Store it for up to 1 year in a cool, dark place, or 2 weeks in the fridge once opened.
Try this strawberry lemonade concentrate at your next barbecue or just for a refreshing drink. Enjoy the flavors of ripe strawberries and tangy lemon for a great homemade drink.
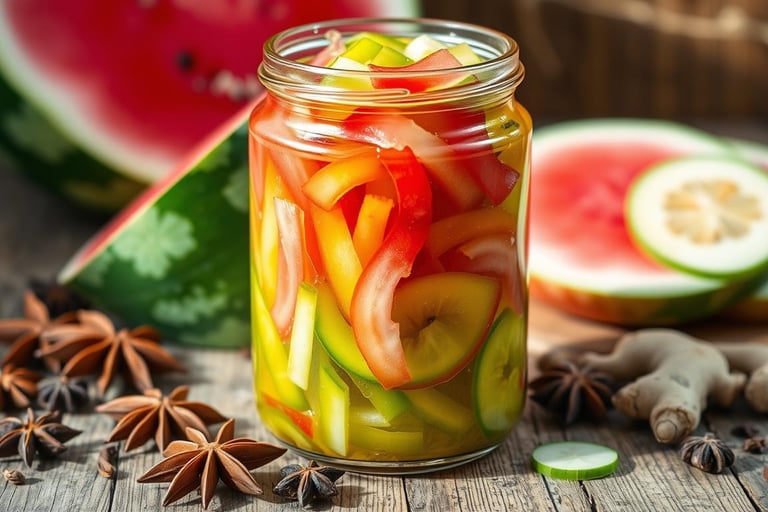
Pickled Watermelon Rind with Asian Spices
Watermelon is a favorite in summer, but its rind can be turned into a tasty pickle. This recipe makes the often-wasted rind into a sweet, tangy, and spicy treat. It's great for many dishes.
The secret is the Asian-inspired pickling liquid. It includes spices like star anise, cinnamon, and ginger. These add a rich flavor to the pickle, making it perfect for cheese platters, salads, and sandwiches.
Preparing the Watermelon Rind
First, peel the green skin off the watermelon rind, keeping only the white part. Cut it into small pieces, making sure they're all the same size for even pickling.
The Pickling Process
In a saucepan, mix rice vinegar, water, sugar, and salt. Heat it until the sugar and salt dissolve.
Take the pan off the heat and add star anise, cinnamon stick, and ginger. Let the spices flavor the liquid for 30 minutes.
Put the watermelon rind in a resealable bag or airtight container. Pour the flavored liquid over it, making sure all pieces are covered.
Refrigerate the pickled rind for at least 4 hours, or up to 3-4 days, to let the flavors meld.
This creates a vibrant, Asian-inspired pickle. Enjoy it as a side, garnish, or snack. It pairs well with grilled meats, fried chicken, or as a tangy addition to summer dishes.
Save the watermelon rind and make a unique Asian-inspired pickle. It's a tasty way to enjoy summer's watermelon and reduce waste.
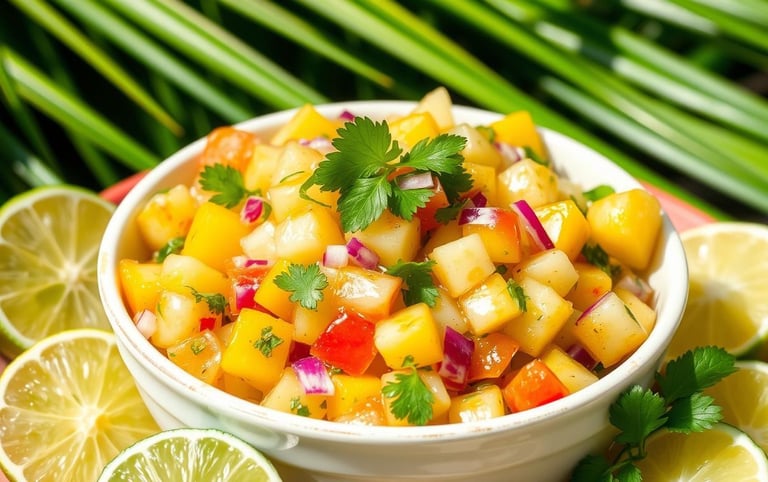
Zesty Pineapple Mango Salsa
Get ready for a tropical explosion with this vibrant pineapple mango salsa! It's a perfect mix of sweet, spicy, and tangy. It's great with tortilla chips or on grilled meats, making any dish better.
Fruit Selection and Preparation
For the best tropical salsa, use ripe pineapple and mangoes. They should be sweet and fragrant. Cut them into small pieces for a smooth salsa.
Adjusting Heat Levels
Add jalapeños or hot peppers for spice. Chop them finely so the heat spreads evenly. For less heat, use fewer peppers or try a sweet bell pepper. This way, you can make it just right for you and your guests.
This tropical salsa is perfect for summer barbecues and gatherings. Enjoy it with chips, on meats, or as a topping for tacos and burritos. It's versatile and adds flavor to anything.
Spiced Apple Butter with Red Hot Candies
Try a new twist on apple recipes with Spiced Apple Butter and Red Hot candies. This mix captures autumn's essence, blending sweet apples with cinnamon candies' warmth. Spread it on toast, fill cakes, or add it to savory dishes for a delightful taste.
To make this spiced apple butter, you'll need 4 pounds of apples. This will give you 5-6 half-pint jars. Use Cortland, Liberty, Sweet 16, Pink Lady, and Honeycrisp apples for the best flavor. Cook the apples with 1 3/4 cups of organic cane sugar, 2 teaspoons of cinnamon, and 1/2 teaspoon of ground cardamom until thick.
The special ingredient is 1 tablespoon of Red Hot candies. They add a fiery cinnamon flavor. If Red Hots are hard to find, use 1/2 teaspoon of ground cinnamon instead.
After cooking, can the apple butter for long-term storage. Sterilize jars in boiling water for 10 minutes. Fill them with hot apple butter and seal. Then, process them in a water bath canner for 15 minutes, adjusting for altitude.
Enjoy it on toast, in yogurt, or as a cake filling. It's also great on pork roast or as baked brie topping. Savor autumn's flavors with this unique apple preserve.
Garden-Fresh Tomato Basil Jam
I love finding new recipes to add to my pantry. The Tomato Basil Jam is a favorite of mine. It mixes the sweetness of tomatoes with the smell of fresh basil. This makes a great spread for many dishes.
Tomato Variety Selection
Choosing the right tomatoes is key for this jam. I use Roma or San Marzano tomatoes. They have a meaty texture and a strong tomato taste, perfect for a savory jam.
Herb Infusion Techniques
Fresh basil makes this herb-infused preserve special. I chop the basil leaves finely and mix them into the jam while it cooks. This lets the basil's scent blend with the tomatoes, creating a delicious mix.
Ingredients:
4 cups chopped tomatoes
1 cup sugar
1/4 cup honey
1/4 cup fresh basil, finely chopped
1 tbsp bottled lemon juice
1 tsp salt
1/2 tsp black pepper
1/4 tsp crushed red pepper flakes (optional)
Combine the chopped tomatoes, sugar, honey, lemon juice, salt, black pepper, and crushed red pepper flakes, in large pot. Bring the mixture to a boil over medium-high heat, then reduce to a simmer. Let it cook for about 45-60 minutes, stirring occasionally, until it thickens to a jam-like consistency. As it cooks, use a potato masher to break down the tomatoes to your desired texture. When the jam has thickened, add the fresh basil and continue to cook for another 5-10 minutes, stirring frequently. Ladle the hot jam into sterilized jars, leaving 1/4-inch headspace. Wipe the rims, secure the lids, and process in a boiling water bath canner for 10 minutes. Remove jars from the canner and let them cool completely. Check the seals, then store the jars in a cool, dark place.
This Tomato Basil Jam is both tasty and a bit sweet. It's great on bread, as a pizza sauce, or in meat marinades. You can use it in so many ways!
If you're into canning or just starting, try this tomato preservation recipe. The Tomato Basil Jam is tasty and versatile. It's sure to become a favorite in your kitchen.
Honey-Sweetened Blueberry Lavender Syrup
Try our Honey-Sweetened Blueberry Lavender Syrup for a taste of nature. It mixes blueberries' sweetness with lavender's calm, all sweetened by honey. This syrup is perfect for adding a special touch to your dishes.
Indulging in the delicate flavors of nature has never been easier than with honey-sweetened blueberry lavender syrup. This delightful concoction harmoniously blends the natural sweetness of ripe blueberries with the soothing floral notes of lavender, creating a unique synergy that tantalizes the taste buds. Sweetened with wholesome honey, this syrup elevates any dish, transforming simple pancakes or yogurt into extraordinary culinary experiences. The vibrant purple hue adds a splash of color, making it not just a treat for the palate, but also a feast for the eyes.
Honey-Sweetened Blueberry Lavender Syrup Recipe
Ingredients:
4 cups fresh or frozen blueberries
1 1/2 cups raw honey (or adjust to taste)
1 tablespoon dried culinary lavender buds (or 2 tablespoons fresh)
1 tablespoon lemon juice (for acidity)
Instructions:
Sterilize jars by boiling them for 10 minutes. Keep jars warm until ready to fill. Prepare a water bath canner and bring the water to a simmer. In a medium saucepan, combine blueberries, honey, and lavender buds. Heat over medium, stirring frequently, until the blueberries start to break down and release their juices (about 10 minutes).
Use a potato masher or spoon to gently crush the blueberries to release even more juice. Let the mixture simmer on low for another 5-10 minutes to deepen the flavors. Carefully strain the syrup through a fine-mesh strainer or cheesecloth to remove solids. Press gently to extract as much liquid as possible.
Return the strained syrup to the pot, add lemon juice, and bring to a brief boil. Ladle the hot syrup into sterilized jars, leaving 1/4-inch headspace. Wipe the jar rims with a clean cloth, place the lids on, and screw on the bands until finger-tight. Process the jars in the water bath canner for 10 minutes (adjust time if at a higher altitude).
After processing, remove jars and let them cool on a towel for 12-24 hours without disturbing. Store and Enjoy! Once cooled, check that the lids have sealed (the lid should not flex up and down when pressed). If sealed, store the jars in a cool, dark place. If any jars didn't seal, refrigerate and use them within a few weeks.
It's easy to make and great for many recipes. Use it on pancakes, in yogurt, or to make drinks more exciting. Honey's sweetness is better than sugar, making it a healthier option.
Explore the world of natural sweeteners, floral syrups, and blueberry recipes with our Honey-Sweetened Blueberry Lavender Syrup. It brings vibrant flavors and endless possibilities to your kitchen.
Pickled Brussels Sprouts with Garlic
Get ready for a flavor explosion! We turn simple Brussels sprouts into tangy, garlicky treats. This recipe will amaze your taste buds and add zest to any dish.
The secret to these tasty pickled Brussels sprouts is the brine. It's a mix of vinegar, garlic, and spices like mustard seeds and peppercorns. They're great as a snack, Bloody Mary garnish, or charcuterie board addition.
We followed safe pickling guidelines for water bath canning. The brine has at least 50% vinegar and 5% acidity. Processing time varies by altitude. These pickled sprouts can last up to 18 months.
Ready to explore the unique flavors of pickled Brussels sprouts with garlic? Let's start!
Ingredients:
3 pounds of fresh Brussels sprouts, trimmed and halved
5 cups of white vinegar (5% acidity)
2 cups of water
1/2 cup of pickling and canning salt
12 cloves of garlic, peeled and halved
12 heads of fresh dill or 3 tablespoons of dill seeds
2 tablespoons of hot pepper flakes (optional)
2 tablespoons of black peppercorns
Pickling Process:
Thoroughly wash the trimmed and halved Brussels sprouts, then set them aside.
In a large saucepan, combine the vinegar, water, and pickling salt. Bring the mixture to a boil, stirring occasionally, until the salt has completely dissolved.
Remove the brine from heat and allow it to cool slightly.
Pack the prepared Brussels sprouts into sterilized jars, leaving 1/2 inch of headspace. Evenly distribute the garlic, dill, and peppercorns (and optional hot pepper flakes) among the jars.
Carefully pour the warm brine over the Brussels sprouts, ensuring they are completely submerged.
Wipe the jar rims clean and place the lids and bands on the jars, tightening them finger-tight.
Process the filled jars in a boiling water bath for the appropriate time based on your altitude: 10 minutes for below 1,000 feet, 15 minutes for 1,000 to 6,000 feet, and 20 minutes for above 6,000 feet.
Carefully remove the jars from the water bath and allow them to cool completely on a wire rack or towel-lined surface.
Check the seals and store the sealed jars in a cool, dark place for at least 1 week before enjoying the pickled Brussels sprouts.
Enjoy the unique flavors of these garlic-infused pickled Brussels sprouts. They're perfect as a snack or an unexpected twist in your dishes.
Mixed Berry and Grape Conserve
Take your cooking to the next level with a mixed berry and grape conserve. This spread mixes the sweetness of berries with grapes' natural pectin. It's a rich, flavorful preserve perfect for many dishes.
Berry Combination Guidelines
For a great taste, follow these tips when making your conserve:
Choose 3-4 berry types, like strawberries, blueberries, raspberries, and blackberries.
Start with 3 cups of mixed berries and 2 cups of grapes. Adjust to taste.
Try different berry mixes to find your favorite sweet, tart, and juicy flavors.
Natural Pectin Sources
Grapes are the secret to this conserve's smooth texture. They are a great source of pectin, so you don't need to buy it. Here's how to use natural pectin:
Using grapes' natural pectin lets you make a fruit conserve that sets well. You won't need pectin additives. Try out different mixed berry recipes to find your favorite.
Conclusion
Exploring water bath canning has shown us it's more than just preserving food. It lets us enjoy the flavors of the season and make special gifts for loved ones. This art form brings joy and connection to our lives.
Home canning also helps reduce food waste and supports local farmers. It's a way to live more sustainably. Every jar I fill is a way to keep memories and traditions alive.
Trying new recipes, like Sweet and Spicy Habanero Apricot Jelly, opens up a world of flavors. It's a chance to explore and share our creations. Let's get creative and enjoy the process of making and sharing homemade treats.
Related Posts:
