Unique Pacific-Northwest Canning Recipes to Try Today
Discover my favorite Unique Pacific-Northwest Canning Recipes featuring local berries, beer, and wine. Perfect for preserving seasonal bounty in your pantry.
PREPPING POSTS
Kathrine-Anne Hill
11/21/202417 min read

Affiliate Disclosure:
Please note that some of the links in this article are affiliate links. This means that if you click on these links and make a purchase, I may receive a small commission at no additional cost to you. This commission helps support the maintenance and growth of this website and allows me to continue providing valuable information and recommendations. Rest assured, I only recommend products and services that I have personally used or thoroughly researched. Your support is greatly appreciated! “As an Amazon Associate I earn from qualifying purchases.” For full disclosure see our Privacy Policy and Terms and Conditions here.
Unique Pacific-Northwest Canning Recipes to Try Today
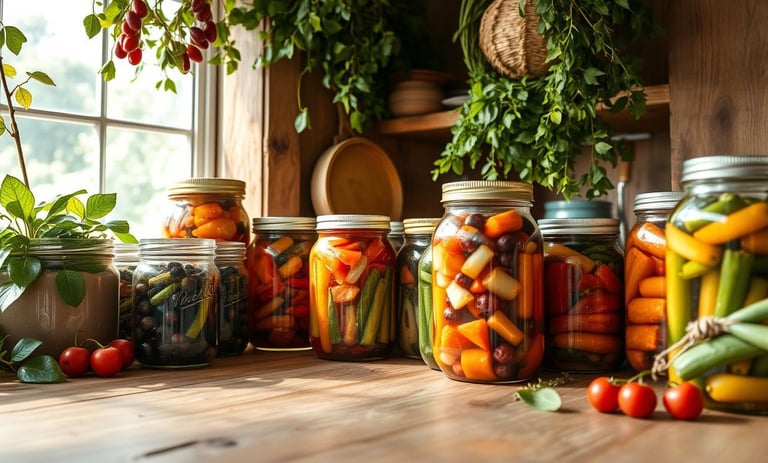
I love canning at home, and living in the Pacific Northwest gives me endless options. We have everything from Washington's apples to the Yakima Valley's cherries. These ingredients make our region a paradise for canning.
But what makes our canning recipes special? What can we create that truly shows off the Pacific Northwest's flavors?
Key Takeaways
The Pacific Northwest offers a wealth of fresh, seasonal produce perfect for canning and preserving.
Unique regional canning recipes often feature local fruits and vegetables, from pickled beans to artisanal fruit preserves.
Traditional canning methods are being revived, with modern twists that showcase the flavors of the Pacific Northwest.
Canning is a sustainable way to enjoy the region's abundant harvest year-round.
Exploring unique canning recipes can unlock the true flavors of the Pacific Northwest.
Introduction to Pacific Northwest Preserving Traditions
Canning has been key in the Pacific Northwest for ages. It lets families enjoy local produce all year. This keeps the region's indigenous culinary traditions alive and celebrates heirloom fruit varieties.
The tradition of saving seasonal harvests has been passed down. Canning is a big part of the Pacific Northwest's food heritage.
Historical Significance of Canning in the Region
The early settlers and indigenous communities in the Pacific Northwest started canning. They knew it was important to store food for the long, harsh winters. They used methods like drying, smoking, and salt-curing to keep food safe.
As farming grew, canning became a way to enjoy summer flavors all year.
Modern Revival of Traditional Methods
Today, there's a big interest in the Pacific Northwest's canning heritage. People want to connect with local food and preserve the region's culinary identity. They're using traditional methods and focusing on local, organic produce and heirloom fruit varieties.
The First Nations Health Authority (FNHA) has helped revive these traditions. They provide resources and training for indigenous communities. Canning Champions from First Nations have shared their knowledge in train-the-trainer programs.
"Traditional food preservation techniques like canning are promoted for communities to have safe access to traditional foods, enhance food security and food safety."
As more people want locally sourced, sustainable foods, the Pacific Northwest's canning traditions are gaining fans. A new generation is excited to explore the flavors and techniques that have shaped the region for so long.
Essential Equipment and Safety Guidelines for Home Canning
As a passionate home preserver in the Pacific Northwest, I know the right equipment and safety are key. Whether you're new or experienced, understanding the basics is vital. It ensures your jars are sealed and your preserves are safe to eat.
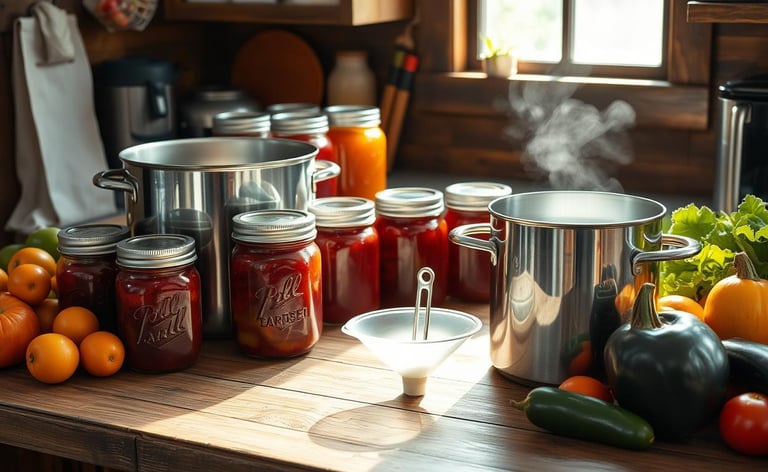
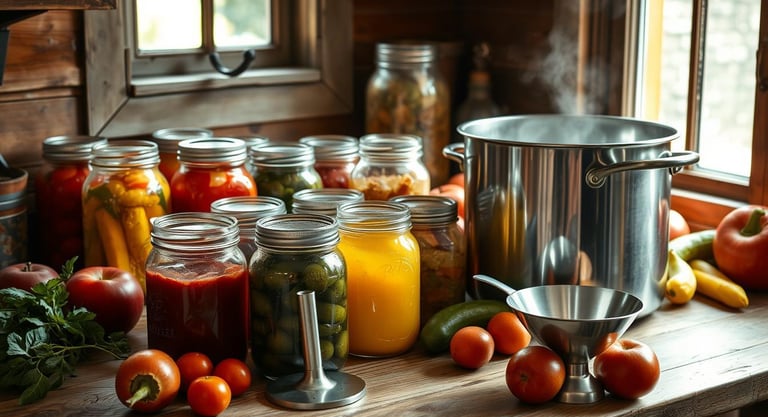
A large stockpot or boiling-water canner is the base of any home canning setup. It lets you submerge jars in boiling water for a vacuum seal. You'll also need canning jars, lids, and rings to close your preserves. For pressure canning, a pressure canner is essential. It uses steam pressure to kill harmful microorganisms.
The Homkula Canning Kit Set has a 20 quart capacity, comes with many accessories, and is compatible with induction and glass top stoves.
Following safety guidelines from trusted sources like the Ball Blue Book is critical. This guide covers water bath canning, pressure canning, and fermenting. It teaches you how to acidify tomatoes, choose the right processing times, and ensure a tight seal on each jar.
"Proper equipment and safety measures are the bedrock of successful home canning. It's the best way to enjoy the bounty of the Pacific Northwest year-round."
As a sustainable forager and small-batch preserver, I stress the importance of knowing canning best practices. With the right tools and a focus on food safety, you'll make delicious, shelf-stable preserves. These will capture the essence of the Pacific Northwest.
Seasonal Produce Guide for Pacific Northwest Canners
As a Pacific Northwest canner, I look forward to the seasonal produce. Summer brings sun-ripened berries, while fall offers crisp apples and hearty vegetables. Each season is a treasure trove of ingredients for preserving.
Summer Harvesting Calendar
Summer in the Pacific Northwest is a joy for home canners. I harvest many delicious items during this time. These include:
Juicy, ripe cherries
Succulent peaches and nectarines
Sweet, fragrant blueberries and raspberries
Vibrant tomatoes and zucchini
These items are perfect for canning. They make great jams, preserves, pickles, and salsas.
Fall Preservation Timeline
In autumn, I focus on preserving different items. I prioritize:
Crisp, flavorful apples and pears
Hearty squash and root vegetables
Savory herbs and spices
These items are great for making warm, comforting canned goods. They're perfect for winter.
Local Fruit Varieties Guide
These local fruits are favorites among Pacific Northwest canners. They're known for their exceptional flavor and quality. I always look for these gems when stocking up.
Artisanal Wine-Infused Cherry Preserves
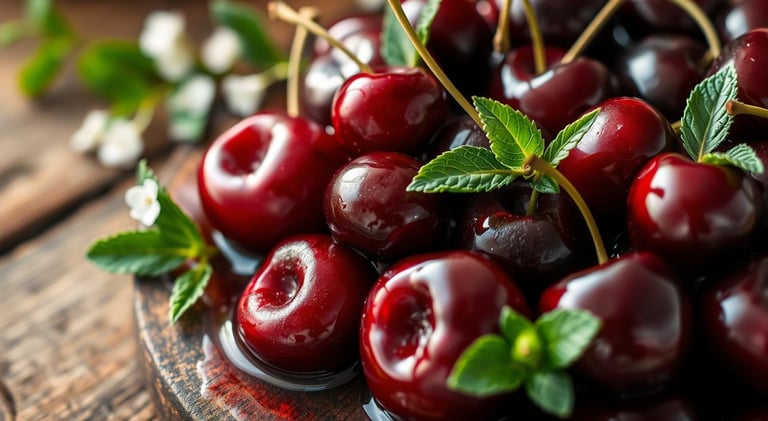
Take your canning to the next level with wine-infused cherry preserves. The trick is to mix the preserves with wine's deep flavors. As a Pacific Northwest canner, picking the right cherries is essential for top-notch preserves.
Ingredients:
Fresh cherries (pitted): 4 cups (about 2 pounds)
Granulated sugar: 2 cups
Dry red wine (e.g., Merlot, Cabernet Sauvignon): 1 cup
Lemon juice: 2 tablespoons
Zest of one lemon
Vanilla extract: 1 teaspoon
Optional spices: 1 cinnamon stick or 1/4 teaspoon ground nutmeg (optional for a spiced note)
Instructions:
Prep the cherries: Wash, stem, and pit the cherries. Cut them in halves if you prefer smaller pieces.
Combine ingredients: In a large, non-reactive pot, combine the cherries, sugar, wine, lemon juice, and zest. Stir to coat the cherries.
Rest for flavor: Let the mixture sit for 30–60 minutes. This macerates the cherries and enhances their flavor.
Cook the preserves:
Heat the mixture over medium-high heat until it begins to boil, stirring occasionally.
Reduce the heat to medium and simmer. Stir frequently to prevent sticking.
Cook for about 20–30 minutes, or until the mixture thickens and reaches the gel stage (220°F/104°C).
Add finishing touches: Stir in the vanilla extract and remove any optional spices.
Jar the preserves: Ladle the hot preserves into sterilized jars, leaving about 1/4 inch of headspace.
Seal and process: Wipe jar rims, seal with lids, and process in a boiling water bath for 10 minutes (adjusting for altitude if necessary).
Selecting the Perfect Cherries
I choose sweet, juicy cherries from the Pacific Northwest for my preserves. These local cherries are full of flavor, making them perfect for my preserves. I use about 1 lb. of fresh cherries for a batch that's both rich and balanced.
Wine Pairing Suggestions
For a classic choice, use a fruity red wine like Merlot or Cabernet Franc. It complements the cherries' natural sweetness well.
Want something bolder? Try a spicy Syrah or Zinfandel to add depth to your preserves.
For a lighter option, try a crisp white wine like Sauvignon Blanc or Pinot Grigio. It adds a refreshing twist.
Choosing the right wine is key. You want to enhance the cherries' flavor without overwhelming them. With some trial and error, you'll find the perfect wine-infused preserve. It will make your unique pacific-northwest canning recipes stand out and impress your guests with your artisanal canning methods.
Low-Sugar Washington Peach and Blueberry Jam
Enjoy the juicy taste of Washington's heirloom fruits with a low-sugar peach jam. This recipe uses ripe peaches' natural sweetness, so you can use less sugar. It's a healthier, more sustainable way to enjoy summer's flavors.
Ingredients:
Fresh peaches: 2 lbs. (about 6 medium peaches, peeled, pitted, and diced)
Blueberries: 3 cups (fresh or frozen, rinsed)
Cane sugar: 1 cup
Lemon juice: 2–3 tablespoons (freshly squeezed)
Optional spices:
1/4 teaspoon ground cinnamon or nutmeg
1 teaspoon vanilla extract (added at the end)
Optional natural thickener: 1/2 grated green apple (optional for added pectin)
Instructions:
Prepare the fruit:
Peel, pit, and dice the peaches.
If you want to skip peeling, blanch the peaches briefly in boiling water, then transfer them to ice water. The skins will slip off easily.
Combine ingredients:
In a large, non-reactive pot, combine the peaches, blueberries, sugar, and lemon juice.
If using grated apple for added pectin, stir it in now.
Macerate the fruit:
Let the mixture sit for 30 minutes to 1 hour. This helps draw out the juices from the fruit and dissolves the sugar.
Cook the jam:
Place the pot over medium-high heat and bring the mixture to a boil, stirring frequently.
Once boiling, reduce the heat to medium and simmer for 25–35 minutes. Stir often to prevent sticking or scorching.
Mash the fruit gently with a potato masher or the back of a spoon, leaving some chunks for texture, if desired.
Test for doneness:
Use a candy thermometer to check for the gel stage (220°F/104°C).
Alternatively, use the chilled plate test: Drop a spoonful of jam on a plate that has been in the freezer. After a minute, push it with your finger. If it wrinkles, the jam is ready.
Add finishing touches:
Stir in any spices or vanilla extract after removing the jam from heat.
Jar the jam:
Ladle the hot jam into sterilized jars, leaving about 1/4 inch of headspace.
Wipe the rims, seal with lids, and process in a boiling water bath for 10 minutes (adjust for altitude if necessary).
Cool and store:
Remove jars from the water bath and let them cool completely. Check that the lids have sealed (they should not pop when pressed).
Store in a cool, dark place for up to 1 year. Refrigerate after opening.
Enjoy this jam on toast, in yogurt, or with cheese. It's a delicious way to celebrate the Pacific Northwest's fruits and sustainable foraging. Enjoy summer's taste all year with this jam.
"This low-sugar Washington peach and blueberry jam is a true celebration of the Pacific Northwest's heirloom fruit varieties and sustainable foraging traditions."
Unique Pacific-Northwest Canning Recipes
The Pacific Northwest is known for its rich culinary traditions and special canning recipes. These recipes have been shared for generations. They mix old preservation methods with new twists, using the area's fresh produce.
Indigenous-Inspired Preservation Methods
The Native tribes of the Pacific Northwest have always known how to preserve food. They dried wild berries to keep them fresh all year. Today, we can use these methods to make tasty jams and preserves.
These recipes honor the region's culinary history. They use berries like salmonberries and huckleberries to create vibrant flavors.
Modern Pacific Northwest Twists
Modern cooks in the Pacific Northwest have added their own twist to traditional recipes. They mix local ingredients in new ways. For example, a Pear and Ginger Chutney uses the area's pears.
Another example is a Blackberry and Lavender Jam. It combines tangy berries with the sweet scent of lavender.
Blackberry Lavender Jam
Ingredients:
Fresh blackberries: 4 cups (about 1.5 lbs)
Granulated sugar: 2 cups
Fresh lemon juice: 2 tablespoons
Dried lavender buds: 1–2 teaspoons (depending on how strong you like the lavender flavor)
Powdered pectin: 1 package (about 1.75 oz or 50 grams)
Water: 1/4 cup
Instructions:
Prepare the jars:
Sterilize 4 half-pint jars and lids by boiling them for 10 minutes. Keep warm until ready to use.
Prepare the lavender:
Place the lavender buds in a small piece of cheesecloth or a spice bag. This makes it easier to remove the lavender from the jam after infusing. If you don’t have a spice bag, you can also use a tea strainer.
Cook the blackberries:
In a large saucepan, combine the blackberries and water. Mash the berries gently with a potato masher to release their juice.
Cook over medium heat for about 5–7 minutes, stirring occasionally, until the berries soften and release their juice.
Infuse the lavender:
Add the lavender bundle to the simmering blackberries and let it steep for 5–10 minutes, depending on how strong you want the lavender flavor. Stir occasionally and taste the mixture during the infusion.
Once the lavender flavor is to your liking, remove the lavender bundle and discard.
Add sugar and pectin:
Stir in the sugar and lemon juice into the berry mixture.
In a small bowl, mix the powdered pectin with 1/4 cup of the sugar to prevent clumping. Add the pectin mixture to the simmering berry mixture and stir to combine.
Boil the jam:
Bring the mixture to a rolling boil over high heat, stirring constantly. Once it starts to boil, continue cooking for 1–2 minutes, or until the jam reaches the gel stage (220°F/104°C on a candy thermometer), or test using the chilled plate method.
Test for doneness:
Drop a spoonful of the jam onto a chilled plate and push it with your finger. If it wrinkles and holds its shape, it’s done. If not, continue to boil for another minute and test again.
Jar the jam:
Remove the jam from heat and skim off any foam.
Ladle the hot jam into the sterilized jars, leaving about 1/4 inch of headspace.
Wipe the rims clean, seal with lids, and screw on the bands until fingertip-tight.
Process the jars:
Process the jars in a boiling water bath for 10 minutes (adjust for altitude if necessary).
Cool and store:
Remove the jars from the water bath and let them cool completely. Check that the lids have sealed properly (the center should not pop when pressed).
Store the jars in a cool, dark place for up to 1 year.
The Pacific Northwest's canning recipes blend old traditions with new ideas. They celebrate the area's natural resources and diverse flavors.
Beer Jelly: A Pacific Northwest Innovation
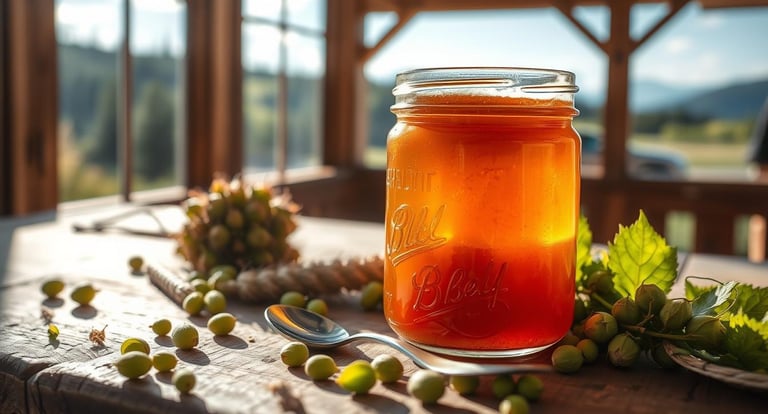
As a person living in the Pacific Northwest, I've always been fascinated by the region's rich culinary heritage. The beer jelly caught my eye. It's a mix of craft beer culture and traditional preserving, creating a unique and flavorful preserve.
Making beer jelly is a labor of love. Crafters pick local, unique pacific-northwest canning recipes and use premium small-batch brews. They add fruit flavors and spices, making a complex, balanced preserve.
Ingredients:
Beer: 2 cups (choose your favorite type; dark beers will have a richer flavor, and lighter beers will be sweeter)
Granulated sugar: 2 cups
Lemon juice: 2 tablespoons
Powdered pectin: 1 package (about 1.75 oz or 50 grams)
Instructions:
Prepare the jars:
Sterilize 4 half-pint jars and lids in boiling water. Keep them warm until ready to use.
Boil the beer:
Pour the beer into a large saucepan. Bring it to a boil over medium-high heat, then let it simmer for 2–3 minutes to reduce carbonation.
Combine sugar and pectin:
In a small bowl, mix the powdered pectin with 1/4 cup of the sugar to prevent clumping.
Cook the jelly:
Stir the pectin mixture into the simmering beer and whisk until fully dissolved.
Add the remaining sugar and lemon juice, and bring the mixture to a rolling boil. Stir constantly.
Check for doneness:
Boil for 1–2 minutes, then test the consistency using the chilled plate test (drop a small amount on a plate from the freezer; if it sets and wrinkles when pushed, it’s ready).
Jar the jelly:
Remove the jelly from heat and skim off any foam. Ladle the hot jelly into sterilized jars, leaving about 1/4 inch of headspace.
Wipe the rims clean, place the lids on, and screw the bands fingertip-tight.
Process the jars:
Process the jars in a boiling water bath for 10 minutes (adjust for altitude if necessary).
Cool and store:
Remove jars from the water bath and let them cool completely. Ensure the lids seal properly (the center should not pop when pressed). Store in a cool, dark place for up to 1 year.
Flavor Variations:
Spiced Beer Jelly: Add 1/2 teaspoon cinnamon or a pinch of nutmeg for a warm flavor.
Hoppy IPA Jelly: Enhance the bitterness by adding 1/2 teaspoon grapefruit zest.
Honey Beer Jelly: Substitute 1/2 cup of sugar with honey for a floral touch.
Bourbon Beer Jelly: Add 1 tablespoon bourbon at the end for a rich, boozy kick.
Beer jelly is very versatile. It's great as a glaze for roasted meats, adding a sweet caramelized flavor. It's also good on cheese boards, boosting the flavors of cheeses and meats. And for those who love sweets, it's amazing on scones, waffles, or as a filling in pastries.
"Beer jelly is the perfect intersection of the Pacific Northwest's renowned craft beer culture and its deep-rooted tradition of artisanal canning methods. It's a unique and delightful way to savor the flavors of the region."
Exploring unique pacific-northwest canning recipes amazes me. Beer jelly is just one example of the region's culinary creativity. I'm excited to see what other delights it has.
Local Herb Foraging Tips
For a true taste of the region, try foraging for local herbs. Coastal sages and wild rosemary add unique flavors. They make your preserves stand out and support sustainable foraging.
Preserving blueberries or other local fruits and herbs is a tasty way to enjoy the Pacific Northwest. It's a chance to explore local seafood preservation and discover new flavors.
Creative Carrot Cake Jam Recipe
I love canning in the Pacific Northwest and always seek out new flavors. My Creative Carrot Cake Jam is a hit. It turns the essence of carrot cake into a spread you can enjoy in many ways.
The jam's flavor comes from a mix of spices like cinnamon, nutmeg, and ginger. These spices enhance the carrots' sweetness. Brown sugar and honey create a rich, caramel-like base. This makes the jam thick and smooth, perfect for toast, baked goods, or as a topping.
This Creative Carrot Cake Jam is incredibly versatile. It brings a touch of artisanal charm to any event. It's a great homemade gift or a treat for yourself, highlighting the Pacific Northwest's unique tastes.
Ingredients:
Carrots: 4 medium, peeled and grated (about 2 cups)
Granulated sugar: 2 cups
Lemon juice: 2 tablespoons (freshly squeezed)
Ground cinnamon: 1 teaspoon
Ground nutmeg: 1/2 teaspoon
Ground ginger: 1/2 teaspoon
Vanilla extract: 1 teaspoon
Orange zest: 1 tablespoon (optional for added citrusy flavor)
Powdered pectin: 1 package (about 1.75 oz or 50 grams)
Water: 1/4 cup
Instructions:
Prepare the jars:
Sterilize 4 half-pint jars and lids by boiling them for 10 minutes. Keep warm until ready to use.
Cook the carrots:
In a large saucepan, combine the grated carrots and water. Cook over medium heat for 5–7 minutes, stirring occasionally, until the carrots begin to soften.
Add sugar and spices:
Stir in the sugar, cinnamon, nutmeg, and ginger. Mix well and bring the mixture to a simmer over medium heat.
Add the lemon juice, vanilla extract, and orange zest (if using). Stir until the sugar is dissolved.
Add pectin:
In a small bowl, mix the powdered pectin with 1/4 cup of the sugar to prevent clumping. Stir the pectin mixture into the simmering carrot mixture.
Boil the jam:
Bring the mixture to a rolling boil over high heat, stirring constantly. Once it starts boiling, continue to cook for 1–2 minutes, or until the jam reaches the gel stage (220°F/104°C on a candy thermometer), or test using the chilled plate method.
Test for doneness:
Drop a small spoonful of the jam onto a chilled plate and push it with your finger. If it wrinkles and holds its shape, it's done. If not, continue to boil for another minute and test again.
Jar the jam:
Remove the jam from heat and skim off any foam.
Ladle the hot jam into sterilized jars, leaving about 1/4 inch of headspace.
Wipe the rims clean, seal with lids, and screw on the bands until fingertip-tight.
Process the jars:
Process the jars in a boiling water bath for 10 minutes (adjust for altitude if necessary).
Cool and store:
Remove the jars from the water bath and let them cool completely. Ensure the lids have sealed properly (the center should not pop when pressed).
Store the jars in a cool, dark place for up to 1 year.
Making this Creative Carrot Cake Jam is easy, but the outcome is amazing. I hope you try it and enjoy the Pacific Northwest's flavors in every bite.
Sustainable Foraging and Preservation Tips
I love canning in the Pacific Northwest. It's important to forage sustainably. The area is full of edible wild plants and berries, thanks to Indigenous communities. By foraging responsibly, we can make tasty preserves and protect our environment.
It's key to never take more than 10% of a plant when foraging. This lets the plants grow back for others. Also, knowing local laws helps us forage legally and right.
Preserving plants like canning, drying, and fermenting is helpful. For instance, Japanese knotweed can be frozen for later use. Chicken of the woods mushroom can be canned or dried for recipes.
"Sustainable harvesting practices include the rule of thirds, where only one-third of what is found should be taken to allow the plants to continue growing."
By using sustainable foraging and preservation, we enjoy Pacific Northwest flavors. We also help keep indigenous culinary traditions and sustainable foraging alive for the future.
Foraging Safety Tips
Never eat a wild mushroom unless you're sure it's safe.
Watch out for Death Cap and Destroying Angels mushrooms, as they can be deadly.
Get a foraging kit with a mesh bag and knife for a safe foraging experience.
Storage and Gift-Giving Guidelines
Keeping your small-batch preserves fresh doesn't end when you seal the jars. It's important to store them right to keep their taste. When you give your homemade goods as gifts, adding a personal touch makes them extra special.
Proper Storage Techniques
For your preserves to last longer, keep them in a cool, dark spot. The best temperature is between 50-70°F. Don't let them get too hot or humid, as this can cause them to spoil. After opening, keep leftovers in the fridge and eat them in 3-4 weeks.
Creative Packaging Ideas
Handmade labels showing off your brand or the preserve's taste
Decorative fabric or twine wraps around the lids
Personalized tags with heartfelt messages for the recipient
Coordinating ribbon or bows that match the preserve's colors
Sustainable, eco-friendly packaging like recycled paper or burlap
Using these creative packaging ideas can turn your small-batch preserves into unique gifts. The personal touch will make your effort even more meaningful for the person receiving it.
Toeksix has a 12 pack of 10 oz canning jars that are a great size for gifts.
Conclusion
Reflecting on the unique canning recipes and techniques, I feel a deep appreciation for the Pacific Northwest's culinary heritage. Canning lets me enjoy the region's flavors all year. It turns seasonal produce into tasty preserves.
Recipes like Garlic Dill Pickles and Beer Jelly show the creativity of Pacific Northwest canners. With the right equipment and safety tips, I'm ready to start my own canning projects. This way, I can keep the essence of this amazing region alive.
Whether making small-batch tomato sauces or herb-infused preserves, Pacific Northwest canning fascinates me. It brings the flavors of this region to my table. I'm reminded of the lush landscapes and vibrant communities that make this place special.
Related Posts:
10 Unique Water Bath Canning Recipes to Try Today
FAQ
What types of canned goods are popular in the Pacific Northwest?
The Pacific Northwest is rich in fresh produce for canning. You can find pickled beans, asparagus, carrots, peppers, beets, and cucumbers. Fruit preserves like peaches, blueberries, and cherries are also favorites. Tomatoes are canned for sauces and chilies.
Jams, jellies, and conserves are must-haves in Pacific Northwest homes.
What is the history of canning in the Pacific Northwest?
Canning has been a big part of preserving food in the Pacific Northwest for years. It helps families enjoy local produce all year. Preserving food has been a family tradition for generations.
Today, there's a growing interest in traditional canning. People are using local, organic produce and heirloom varieties.
What equipment is needed for successful home canning?
You need the right equipment and safety measures for home canning. You'll need a stockpot or boiling-water canner, jars, lids, and rings. It's important to follow safety guidelines for sealed jars and safe eating.
The Ball Blue Book is a great guide for beginners. It covers safe canning practices.
What seasonal produce is best for canning in the Pacific Northwest?
The Pacific Northwest has a wide range of produce for canning. Summer brings berries, cherries, and early stone fruits. Fall is perfect for apples, pears, and late vegetables.
Local fruits like Washington peaches and cherries are known for their flavor and quality.
What are some unique canning recipes from the Pacific Northwest?
Try preservation methods inspired by the Pacific Northwest's indigenous traditions. Use local berries and herbs. Modern recipes might mix flavors or ingredients in new ways.
For example, beer jelly is a unique creation. It combines craft beer with traditional preserving.
How can I store my canned goods and give them as gifts?
Keep your preserves in a cool, dark place to last longer. For gifts, use creative packaging. Add handmade labels and decorative touches for a personal touch.
